"When I try to delete some unwanted files I got a warning dialog box saying: You need permission to perform this action. I don’t know what it is, and How do I get these permissions?" - From Denny.
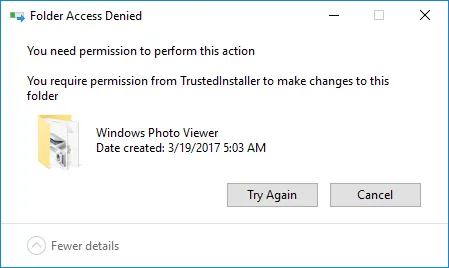
Under normal conditions, all of the files and folders in windows 10 are included in the particular account, that is called “trustedinstaller”. Trustedinstaller is a build-in security principal that has appeared since windows vista, with permission to modify system files in windows, and is itself a service in the form of an account group. Occasionally, if you are trying to delete a file or a folder in your computer, there may appear an "folder access denied" dialog box on the screen and saying “You require permission from TrustedInstaller” to delete the file. That’s not a problem most of the time. In the Windows, when you need to optionally delete, rename or edit the file that is owned by TrustedInstaller, you have to first get ownership of the files or folders then gain the full control permissions.
This article introduces a method to teach you how to take permission from trustedinstaller in windows 10.
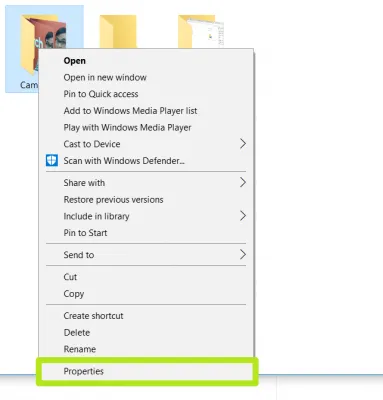
Step 1: choose the targeted file or a folder, and then right-click it, then select the “properties” in the menu bar.
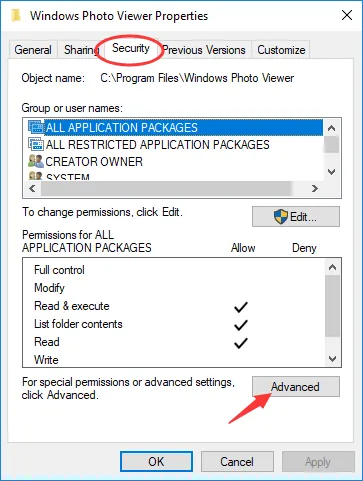
Step 2. In the Camera Roll Properties window, select the “security”tab and click the “advanced” button.
Step 3. In the Advanced box, click "Change" next to the owner name. Then in the new Window, move to Owner tab and you will all the current owner that is is TrustedInstaller.
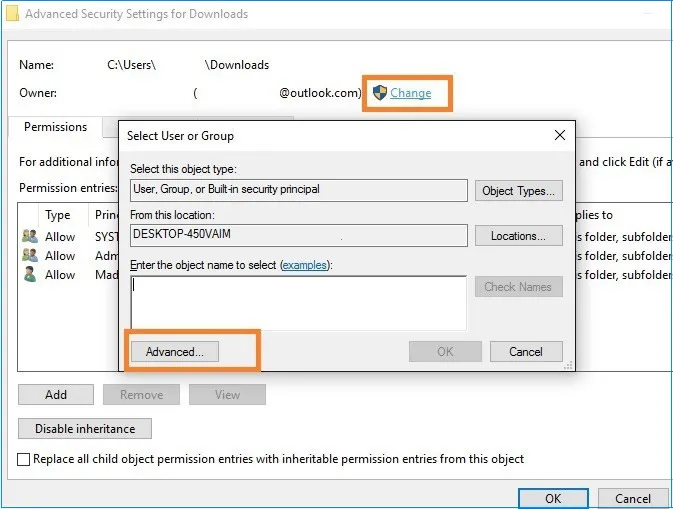
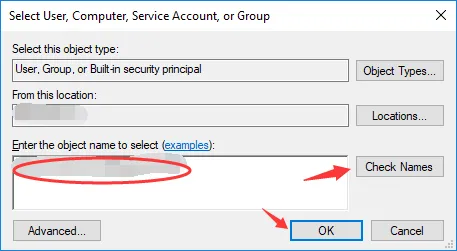
Step 4. Click the Advanced button and in the popping-up Window, you need to select your username. You can click the Check Names button to display all the created Usernames in your Windows 10.

then select your username and click OK.
Step 4. If you want to delete or modify a folder, then you need to check the Replace owner on subcontainers and objects.
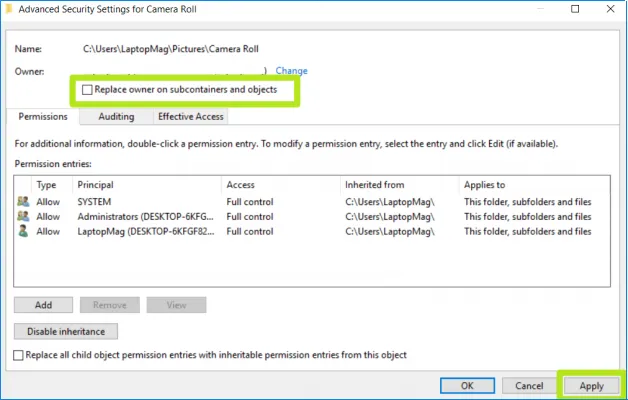
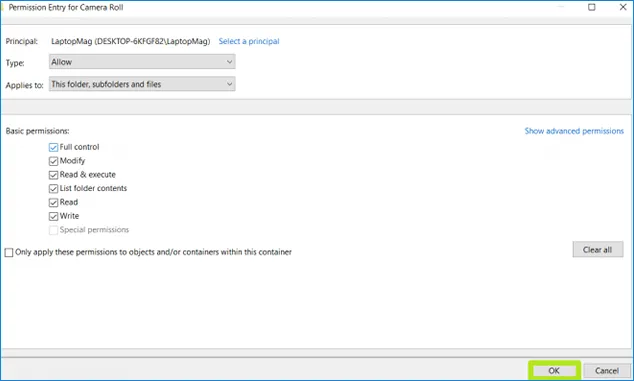
Step 5. Click the OK button to close the Widnow, then click Advanced again and click Change permissions button under Permission entries. Check the box "Full control" in Basic permissions section, and hit OK.
Step 6. Tick this box: Replace all child object permission entries with inheritable permission entries from this object. After that, click on OK all the way out.

Now, you can delete or modify the files or folders without getting messages “You require permission from TrustedInstaller” message. Besides of this file, you can also take full control of other files by applying this permission change to it. But note, you need to be aware that those folders that require TrustedInstaller permission usually contains some important system files, there is a risk if you force to delete it.

Nadine is the Editorial Director at PassCue Studio. You can also find her on social network.